I’m going to teach you how to plan your week on a single piece of paper and use your phone (something you already carry everywhere) to keep track of scheduled events. With this two-part system you can maximize your efficiency (and maybe even ditch your annual planner, but only if you want to!)
For your convenience, this post contains affiliate links from Amazon.com and eMeals. This means that if you click on a link and make a purchase, I make a small profit at no additional charge to you. You can read my full disclosure policy here.
Nowadays, it seems like almost every woman I know has a planner. I think it’s fun to see what kinds of planners people use and how they use them.
Some women use planners that have a special emphasis on setting goals. These planners often include several pages for journaling and reflecting.
Some women use Happy Planners (that’s the kind I’ve used in the past). Those are probably my favorite as they are colorful and literally make you happy just flipping through them.
Some women spend several hours a week decking out their planners with stickers, doodling, and decorating their weekly schedule. They enjoy the process of organizing their week and turn their planners into memory books.
Me, I’ve realized that when it comes to planners, I’m a bit utilitarian. I loved having a gorgeous planner to carry around with me, but honestly, sometimes it just felt like yet another thing to carry. For example, when I take my kids to their pediatrician appointments, I don’t carry my planner (especially since I rarely carry a purse).
I am a person that is constantly evaluating “stuff” and am always trying to eliminate things that I don’t use. My big annual planner was beautiful and functional for the most part, but at the end of every year, I’d find that I had several pages that were unused. There were sections for things like contact info, random places for notes, and other things that I can’t even remember. I was mainly using my planner for the weekly overview pages and nothing else.
To continue purchasing and carrying around a planner that I wasn’t fully utilizing seemed wasteful and inefficient.
For me, my primary goal for using a planner is to maximize my efficiency. I need a place to write down all my scheduled events (like meetings and appointments), things I need to do, and random things I need to remember. Instead of using my planner to keep track of these things (and having to carry it around everywhere I go), I decided to embrace planner minimalism. I ditched my planner and decided to develop a system that was more functional for me. After a few months of trying different things, I have developed a planner system that is easy and works. If you are not committed to your planner, then you have got to give this a try.
(Even if you love your planner, you could still implement this system in your planner!)
Plan Your Week with the Combination System:
This combination planning system requires two parts: Google Calendar (on your phone) and a piece of paper. At the bottom of this post, you’ll find a link to download a weekly planner page. There are 4 planner page templates available for free at the bottom of this post (we will talk more about this later).
To get started, you need to download Google Calendar on your phone (if you don’t have it already). You can use your Google account to login into the app (if you have a Gmail account, you can use this login information).
Schedule and Keep Track of Scheduled Events in Google Calendar:
You are going to use Google Calendar to keep track of scheduled events. Scheduled events include things like meetings, doctor’s appointments, and oil changes. I would include things like birthday parties, Zoom calls, and anything that is “scheduled” at a certain time.
I love Google Calendar because it’s so easy to use (and it’s FREE!) If needed, you can always look up your calendar on a computer.
In case you aren’t familiar with Google Calendar, you’ll find on that app that you can schedule a goal, reminder, task, or event. For this combination planning system, I would schedule everything as an “event” in your calendar.
So as an example, suppose you are at work and your boss is trying to schedule a meeting. You can look at your Google Calendar to see all your “scheduled events” in your calendar and then add the new meeting as an “Event” in your calendar. The same goes for dentist and doctor’s office appointments.
How to Use Your Planner Page to Plan Your Week:

Now here’s where the magic happens. Every Sunday night, I grab 4 things; the previous week’s planner page, my phone, a blank planner page, and a pen.
(You could also bring out these household trackers to see if you have any household tasks, birthdays and anniversaries, or doctor’s appointments that need to be added to this week’s planner page.)
I find that by filling this out Sunday night, I am more intentional about what I want to accomplish that week and helps me be mindful of my scheduled obligations for the week.
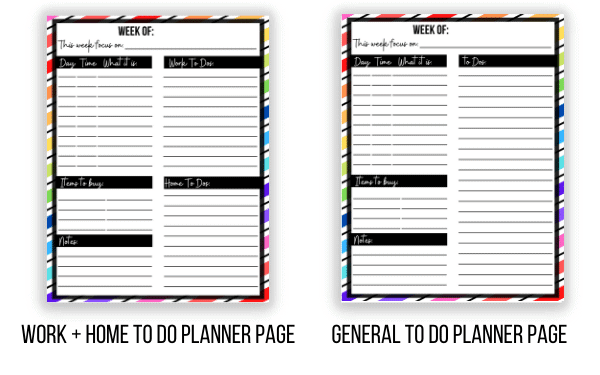
The first thing you’ll do is add the dates of the upcoming week at the top of your planner page. At this time, skip the “This week focus on” section, we’ll discuss this more later.
The next thing you’ll do is open your Google Calendar app and write all your scheduled events for the week on your planner page. You’ll write down these events in the section that says: “Day/Time/What it is.” Since space is limited, for the “day” column, I simply write the initial of the day (M, Tu, W, Th, F, Sa, Su).
The next section is for “Items to Buy.” First I look at the previous week’s planner page and carry over any items that still need to be purchased. (If I can buy them on Amazon, I usually buy them at this point.) Then I spend a few minutes thinking about if there’s anything else I need to buy. (I don’t write my entire grocery list on this planner page because I use this Emeals, an awesome and super economical meal planning service for a majority of my groceries. If you want to learn more about Emeals, click here to get a free 14 day trial.)
The next section is for “Notes.” This section is mainly used for jotting down random things. For example, my son had a temporary library card a few weeks back. I wrote his “temporary number” in my notes section so that I could easily access his account before he received his card in the mail.
Or if I’m taking care of a task on the phone and need to jot down a confirmation number or another phone number, I can use this space for that
It’s kind of like a sticky note.
The next section is for “To Dos.” This is a place to list the things you want or need to tackle in the upcoming week. Start filling in this section by carrying over any items on your previous week’s Planner Page that haven’t gotten done. For your convenience, I’ve made two versions of the planner page; one has a place for “Work To Dos” and “Home To Dos” and one simply has a section for “To Dos.”
Since I’m working from home, I like to have a list of things I need to accomplish for work. Because I’m not going into work currently, during my “working hours” I make sure I focus on the tasks on my “Work To Do” list.
After I’ve filled out my planner page for the upcoming week, I try to spend a few minutes to see if I can think of any other tasks that need to be included on this page. Additionally, I think about something I want to focus on during the upcoming week. I might choose to focus on decluttering or cleaning a certain room, spending more intentional time with my kids, or relaxing.
Using Your Planner Page:
Now that you’ve completed your planner page, you are ready for the week to start. Because I’m working from home currently, I set my planner page and a pen on my kitchen counter and reference it several times a day.
If you aren’t working from home, you have two options. You can either carry it with you to work to set it on your desk. I would leave it on your desktop so you are more mindful about the tasks on this list. Your other option is to take a picture of it and reference your tasks on your phone as needed.
I glance at my planner page several times a day. I find that the “This Week Focus on” statement at the top of this page helps me be more intentional about my goals for the week.
Suppose I’m cooking dinner and run out of chicken broth, (I could add it directly to the Walmart app for grocery pick up), but if I’m busy I’ll quickly add it to my “Items to Buy” list.
If I have 5 minutes to knock something while my kids are playing, I’ll find a small task on my “To do” list to knock out.
I do cross things off of my list as I get them done.
Tips about the Planner Page:
I would suggest printing your planner page on cardstock. I find that cardstock makes the ink on my page brighter and makes my list more durable. I sometimes print it on colored cardstock so it makes it easier to find (in a pile of white paper, a bright yellow page sticks out!)
I’ve included 4 different templates for your planner page. Two templates are colorful and two are black and white. They have the same layout. If you don’t have a color printer or don’t want to waste ink, I’d use the black and white template and print it on colored cardstock.
If you are using my cleaning schedule printable, you could print it on the back of your planner page (so it’s all in one place).

What are you waiting for? Go plan your week!
 Now that you have the two tools you need for this combination planning system, what are you waiting for? Go get started! Remember, events with a time go into your Google Calendar as an event. Tasks that need to be completed go on your “To Do” list.
After you give this system a try, come back and tell me how it went!
Stay savvy.

Wish your day-to-day was less chaotic?
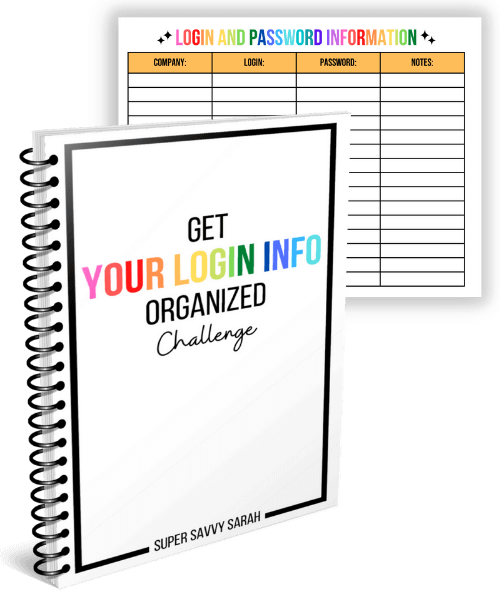
The journey to a less stressful household starts with a single step. Getting all your login information organized is a GREAT first step. (Seriously – don’t underestimate the power of this small task!)
Sign up for this FREE challenge to get an eBook to guide you through this process and the worksheet that will whip your login information into shape!